
Chiral Cloud 2.0.76 brings a new diary. It looks familiar, but it is quicker, easier to read and does more with the mouse and keyboard: you can book by dragging across the slots, move and resize appointments by dragging them, magnify a busy day and book straight into a booking zone. This guide takes you through it step by step.
The pictures use a made-up test patient in a demo practice.
1. The basics
Open the diary from the Home page with Practice Diary (every clinician side by side), Clinician Diary (one clinician, full width) or Practice Week Diary (a week at a time).
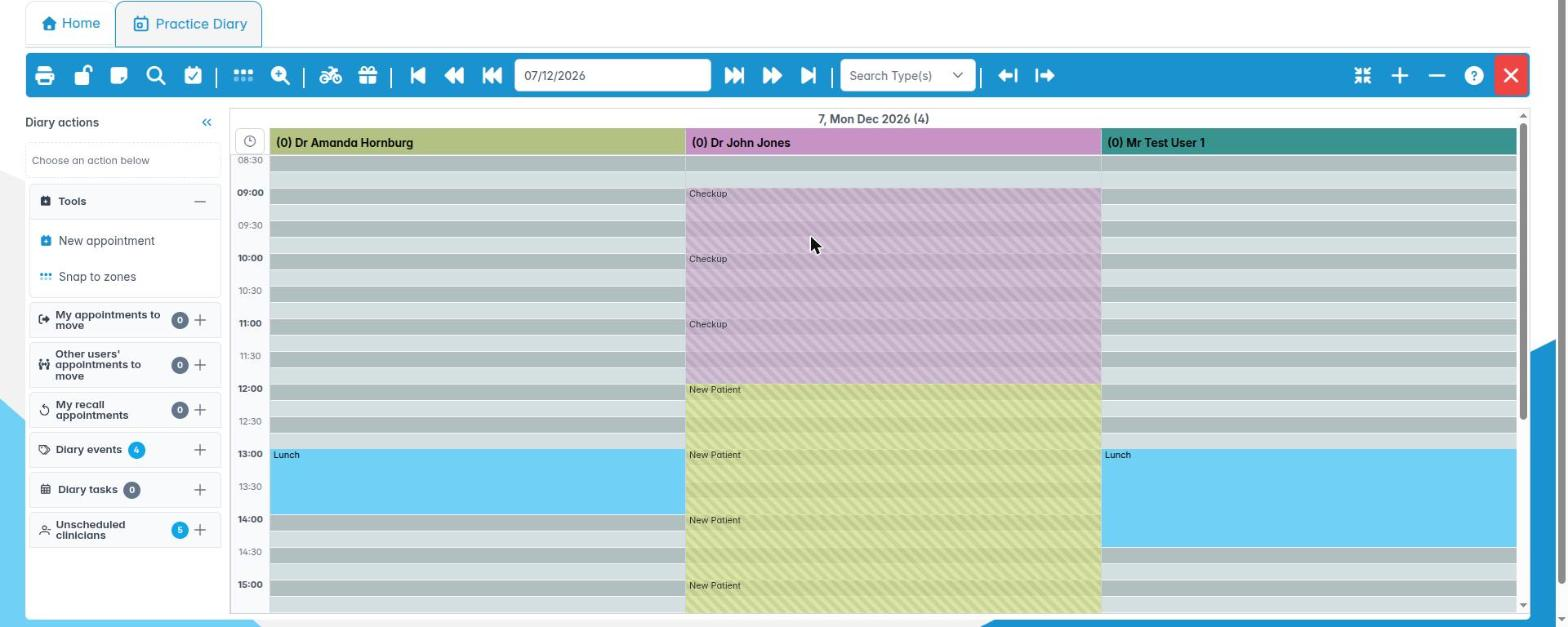
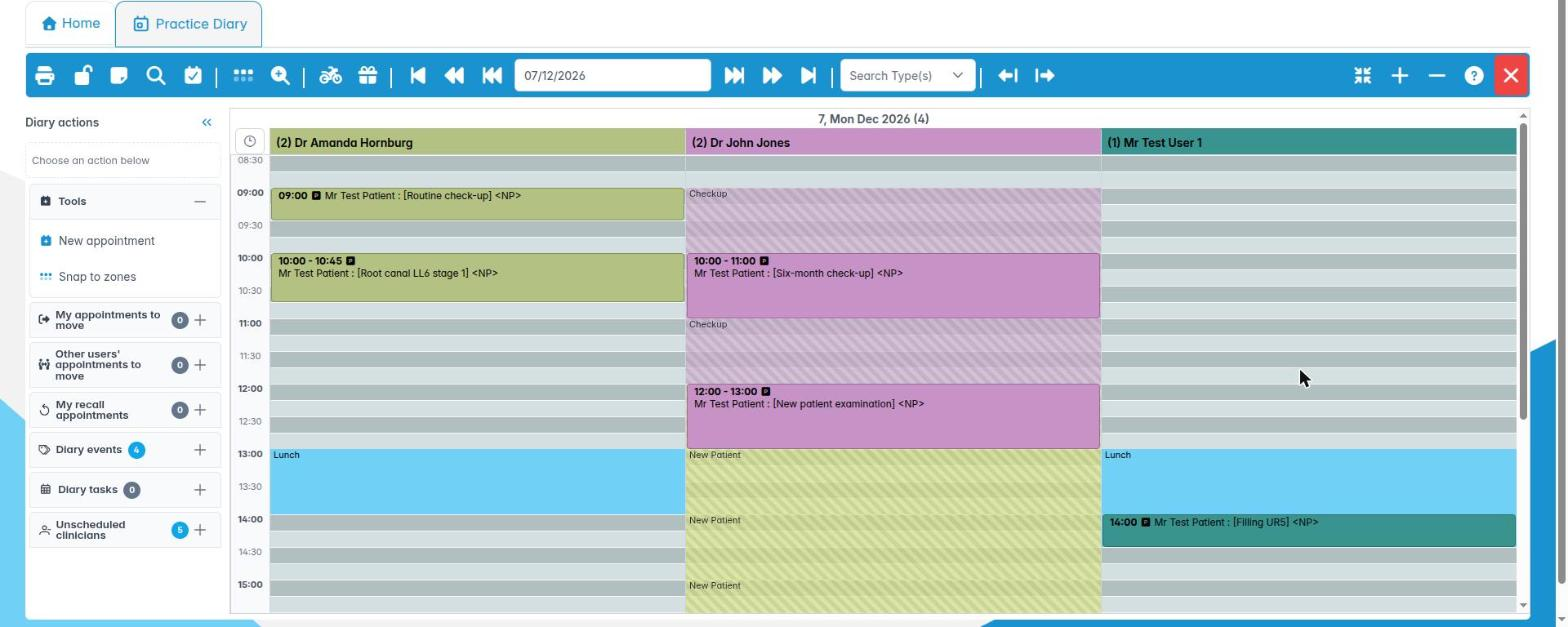
Each clinician has a column. The number in brackets in the column heading is how many appointments they have that day. The time runs down the left.
- Shaded, striped blocks are booking zones set up in Diary Schedules (for example Checkup or New Patient). The zone’s name is shown at its top.
- Lunch and other set breaks are shown in light blue.
- Each appointment card shows its time, the patient, the summary in square brackets and the patient’s journey stage (for example <NP>).
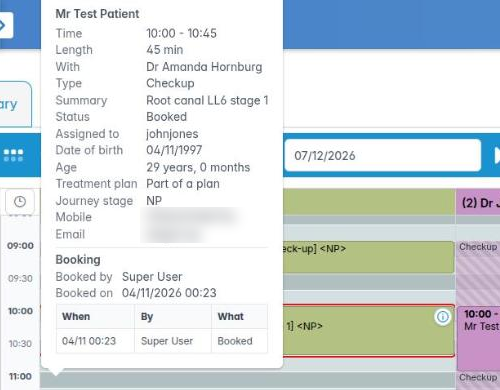
Click a card to select it; it gets a red outline. A small i appears in its top right corner, which opens the appointment’s details.
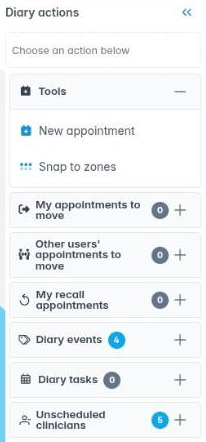
The Diary actions panel on the left holds the tools: New appointment, Snap to zones, the lists of appointments waiting to be moved, recalls, Diary events (meetings, reservations) and Diary tasks.
Click a heading’s + to open it. Click « at the top to fold the panel away and give the diary more room.
2. Moving around the diary

The arrows either side of the date move the diary:
- |◀ / ▶| back or forward a month,
- ◀◀ / ▶▶ back or forward a week,
- ◀ / ▶ back or forward a day.
- Click the date to pick a day from the calendar.
Search Type(s) and the two arrows next to it find the previous or next day that has free time of the appointment types you pick.
The week view
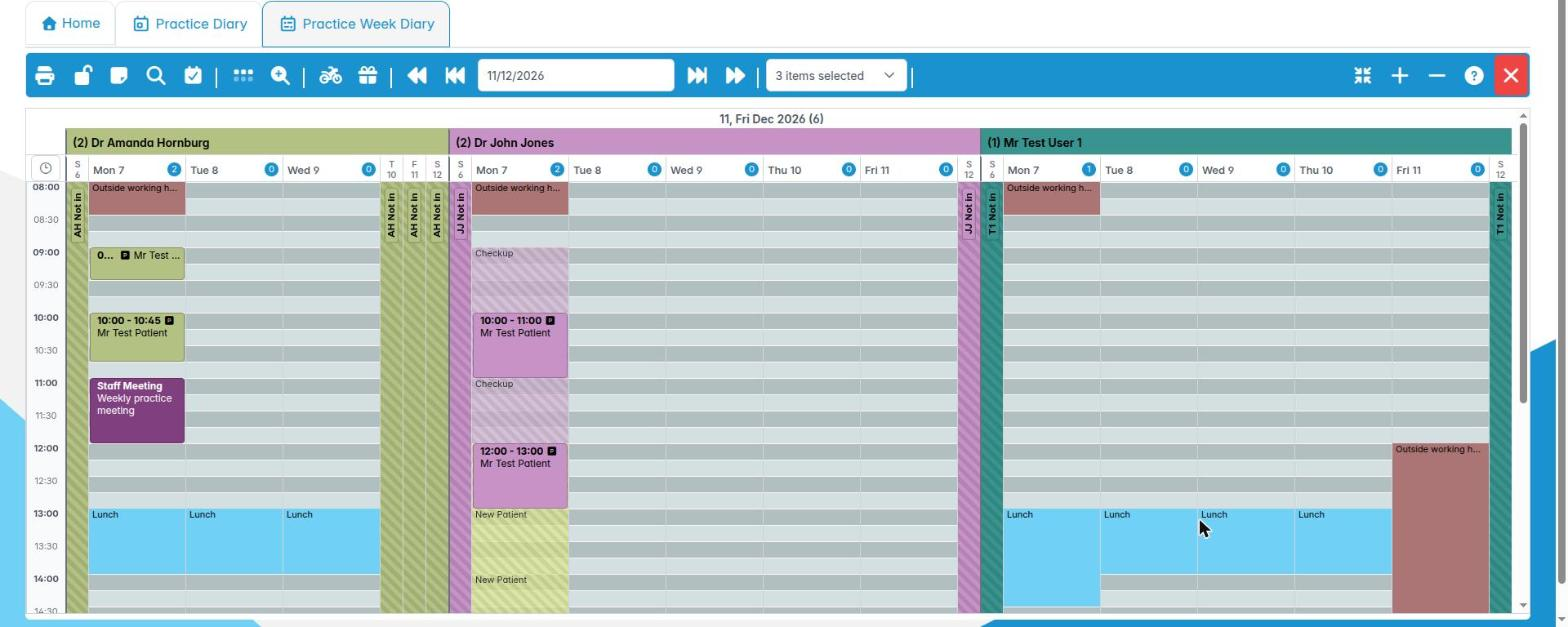
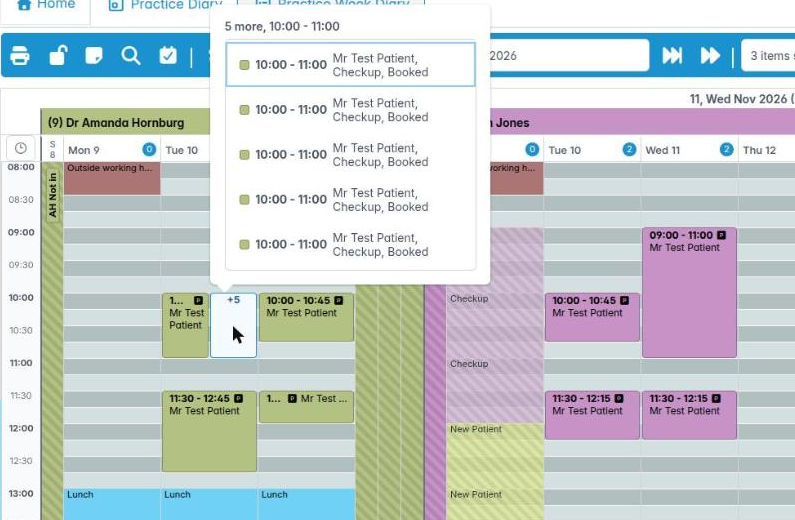
Practice Week Diary shows the whole week for each clinician. Days a clinician does not work are narrow columns marked Not in, and time outside their working hours is marked Outside working hours.
When a slot is too busy to show every appointment, you see a +5 (or similar) chip. Click it to list the hidden appointments with their time, patient, type and status, then click one to select it.
Use Select Clinician(s) in the toolbar to choose whose week you see.
The Clinician Diary
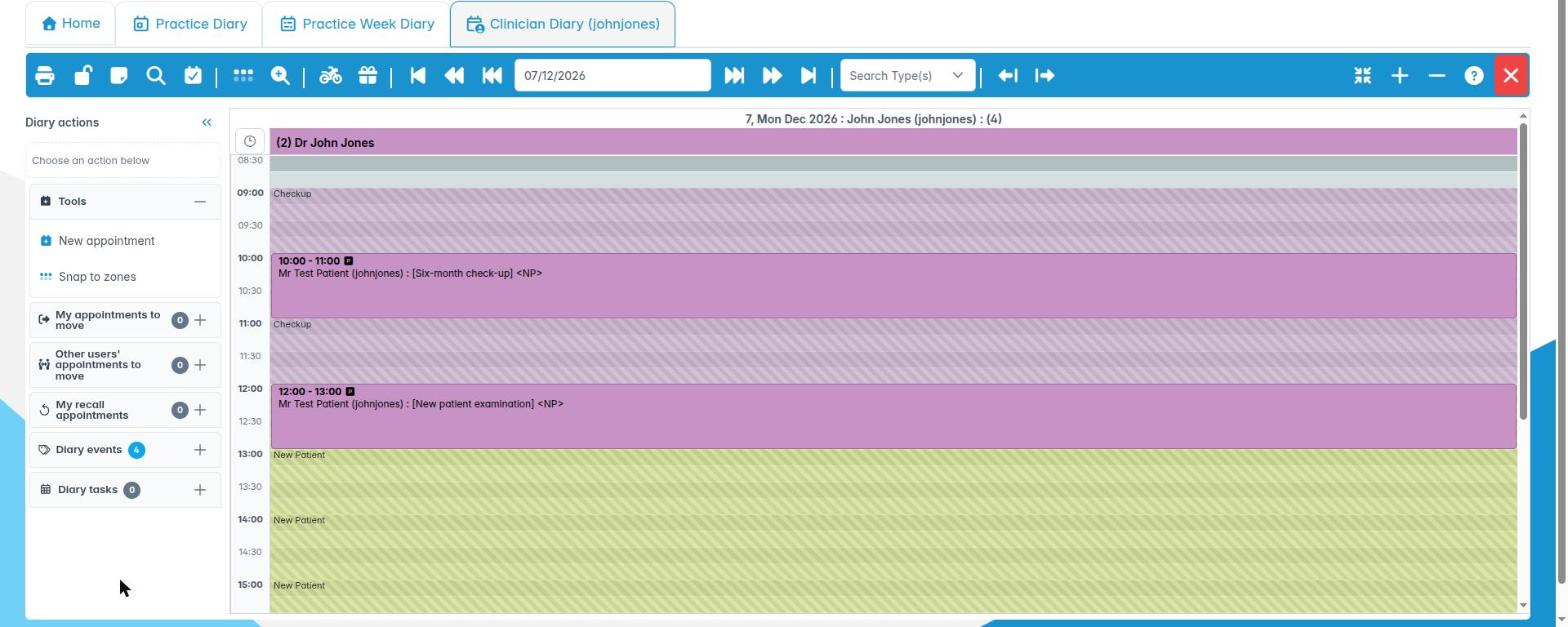
Clinician Diary asks which clinician you want, then shows just their day. It works exactly like the Practice Diary.
3. Booking, moving and removing appointments
Booking an appointment
Drag down across the free slots in a clinician’s column, from the start time to the end time, and let go. The time you dragged is held for you while you choose the patient.
In the window that opens:
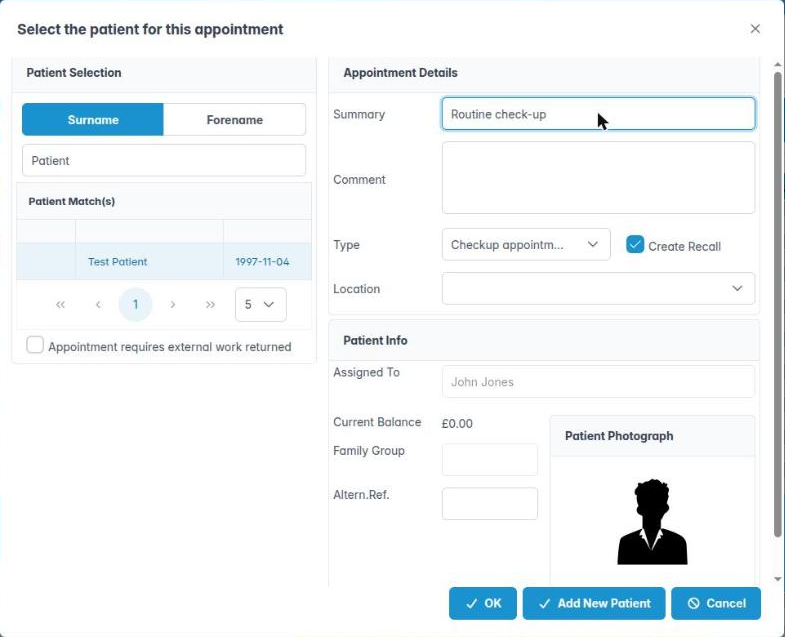
- type the patient’s surname (or click Forename) and click the patient,
- add a Summary (it shows on the card) and any comment,
- check the Type,
- click OK.
You can also right-click an empty slot and choose Book appointment here, or use New appointment in Diary actions and click a slot.
Moving an appointment
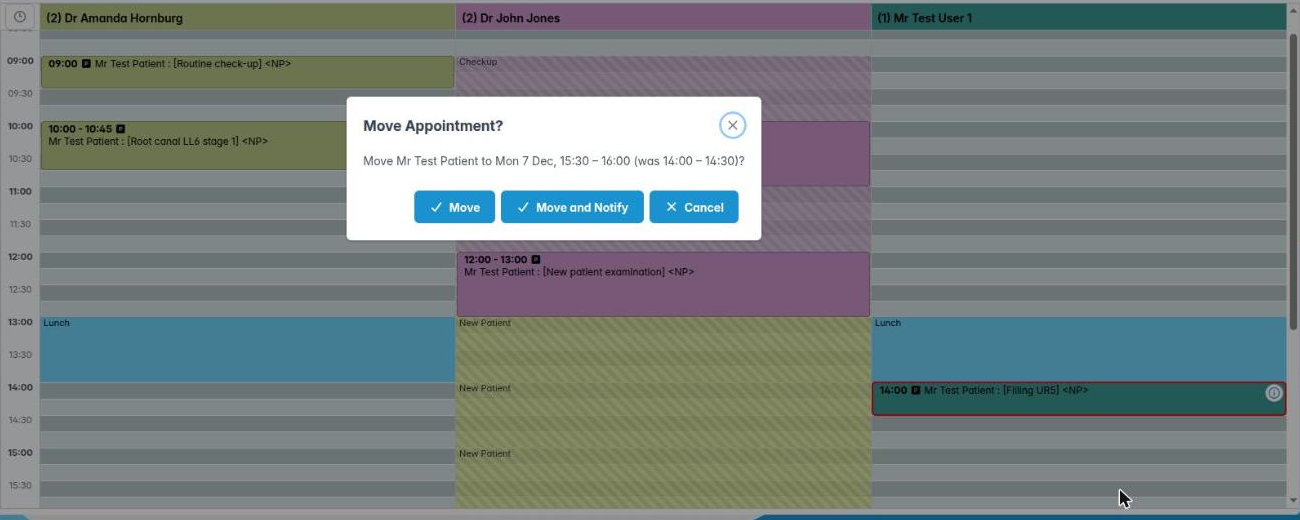
Drag the appointment to its new time, or into another clinician’s column. When you let go, the diary asks you to confirm and shows the old and new times:
- Move moves it,
- Move and Notify moves it and sends the patient the change,
- Cancel leaves it where it was.
Moving to another clinician names the new clinician in the question. You can drag past the top or bottom of the diary; it scrolls for you.
Making an appointment longer or shorter
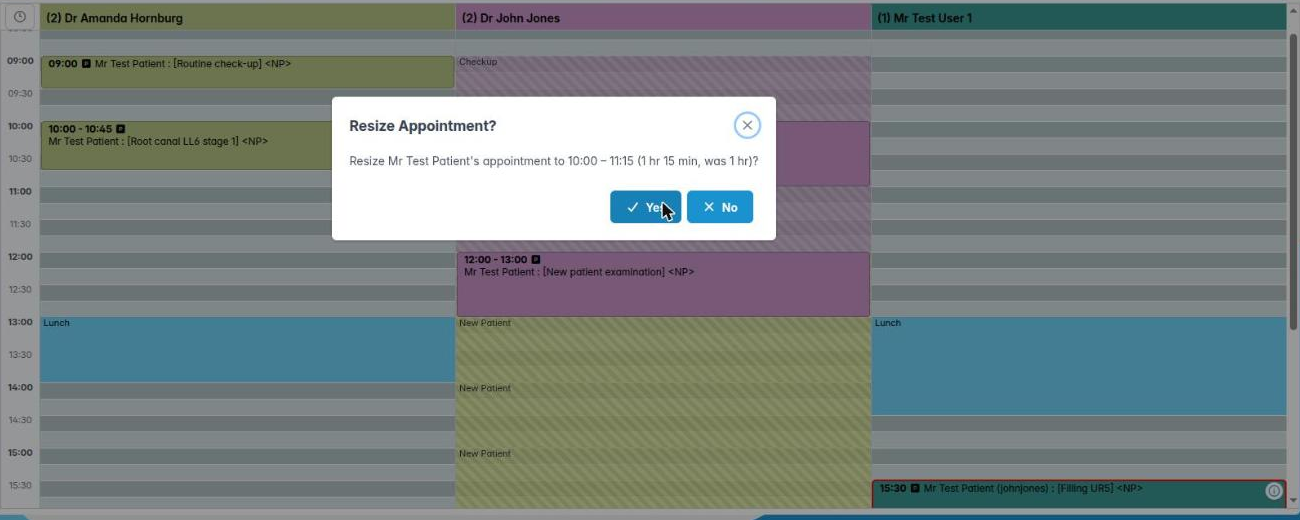
Point at the bottom edge of the card; the pointer changes to a resize arrow. Drag the edge down to make the appointment longer or up to make it shorter, then click Yes to confirm. The start time stays the same.
If the diary cannot save a move or a change of length (for example the connection drops), you see Appointment not moved or Appointment not resized and the card goes back to where it was. Nothing is changed, so simply try again.
Removing an appointment
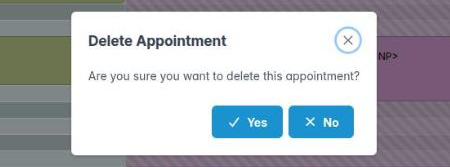
Right-click the appointment and choose Delete Appointment, then Yes. To keep a record that the patient cancelled, choose Cancel Appointment instead.
4. Menus
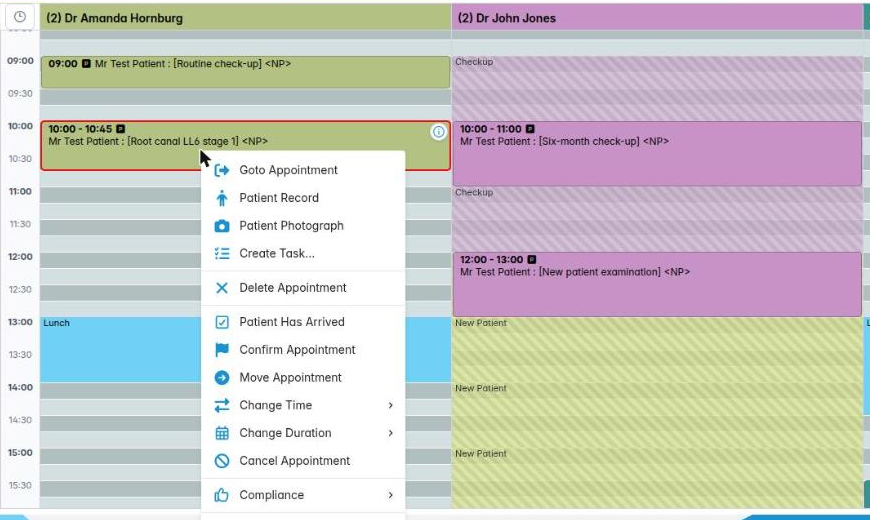
Right-click an appointment for everything you can do with it, including:
- Goto Appointment, Patient Record and Patient Photograph,
- Create Task…,
- Patient Has Arrived and Confirm Appointment,
- Move Appointment (puts it on the list of appointments to move),
- Change Time and Change Duration without dragging,
- Cancel Appointment and Delete Appointment,
- Compliance.
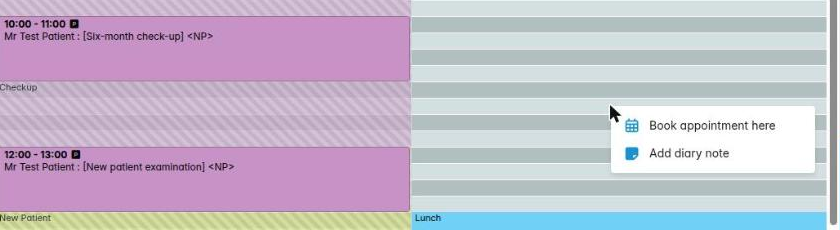
Right-click an empty slot to Book appointment here or Add diary note.
On a keyboard, select a card and press Shift+F10 (or the menu key) to open its menu.
5. The toolbar
From left to right the toolbar has: Print day view, Hide patient details (for a screen patients can see), Create a diary note, Find Patients, Find available slot, Hide Zoning, Magnify appointments, the lab work buttons, the date arrows and type search. On the right are Compact View, + / − to make the time slots taller or shorter, ? for help and Save & Exit.
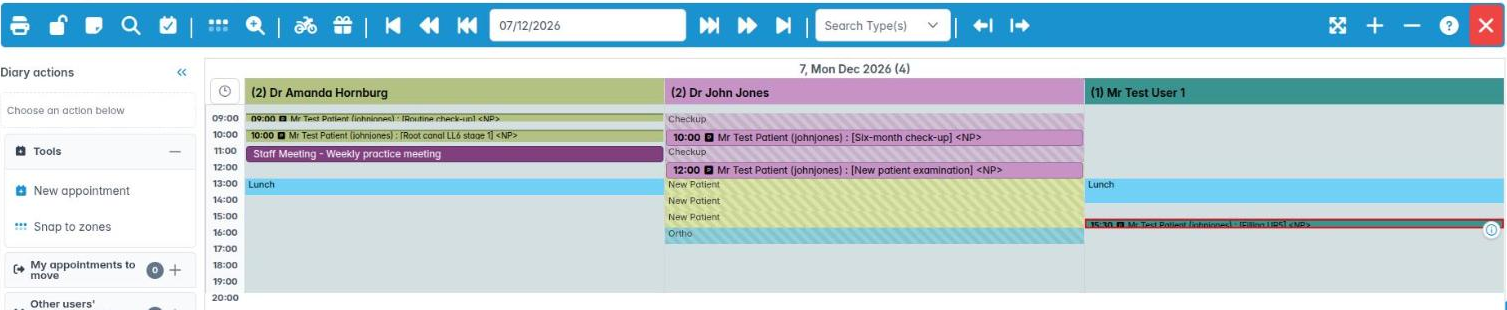
Compact View squeezes the whole day onto the screen so you can see it at a glance. Click the same button (now Expand View) to go back.
6. The magnifier and appointment details
Click Magnify appointments in the toolbar (or press M). Now, when you point at an appointment, a large copy of the card appears with all its details: time, length, clinician, type, summary, status, the patient’s age and journey stage, contact details and who booked it and when.
This is handy on a busy day when cards are small. Click the button again (or press Esc) to turn the magnifier off.
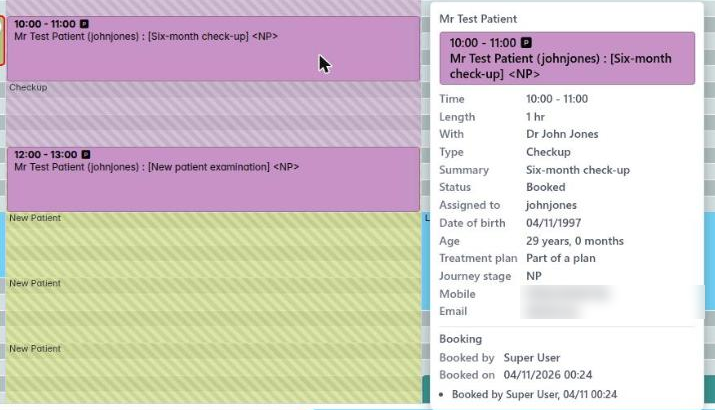
Without the magnifier, click the i on a selected card (or press i) to see the same details. Press Esc to close them.
7. Snap to zones
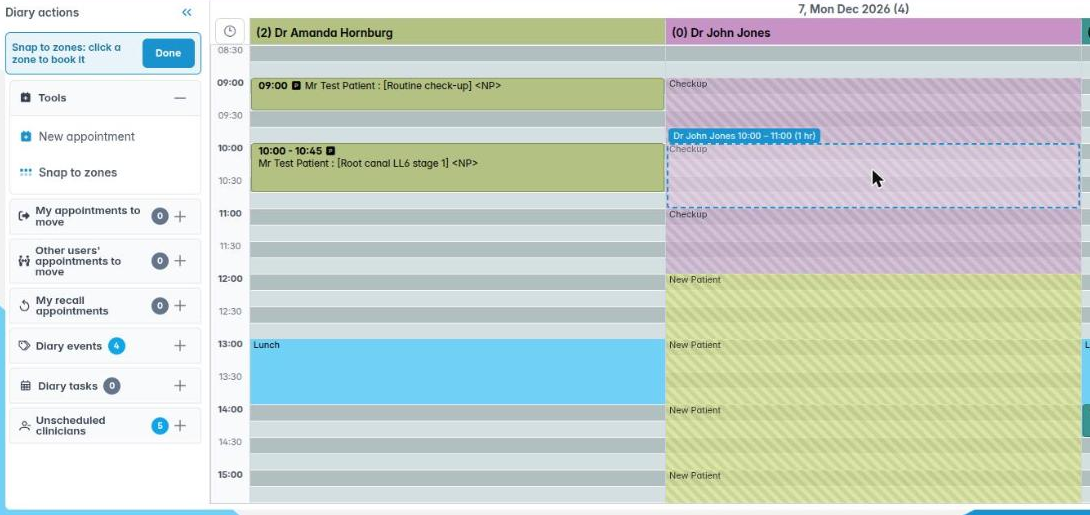
Booking zones are the times a clinician keeps for a type of appointment, such as Checkups in the morning and New Patients after lunch. Snap to zones books a whole zone with one click.
- Click Snap to zones in Diary actions. The panel says Snap to zones: click a zone to book it.
- Point at a zone: it is outlined and labelled with the clinician, time and length.
- Click it. The booking window opens with the zone’s appointment type already chosen.
- Choose the patient and click OK. The appointment fills the zone exactly.
- Click Done when you have finished.
A click outside every zone books nothing. To set up zones, see Diary Schedules.
8. Point, click and drag
Most of the diary works by pointing and dragging:
- Drag across empty slots to book that time.
- Drag a card to move it, in the same column or to another clinician.
- Drag a card’s bottom edge to change its length.
- Click a card to select it; double-click to open it.
- With a tool armed (New appointment, Snap to zones, a diary event or a treatment plan), click a slot to place it there.
Diary events: meetings and reservations
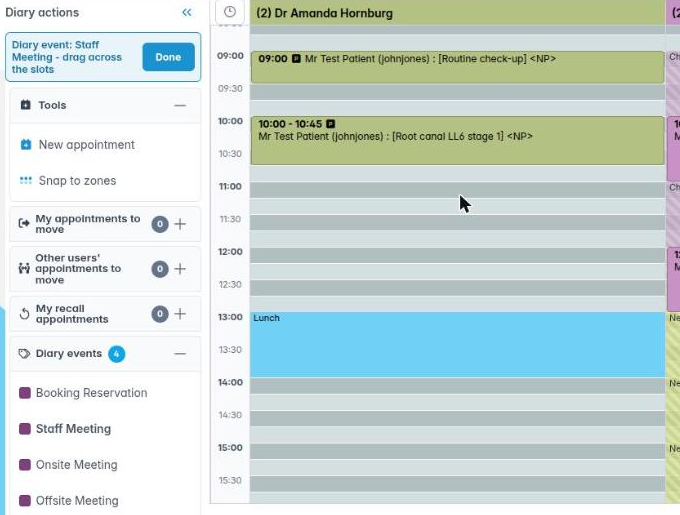
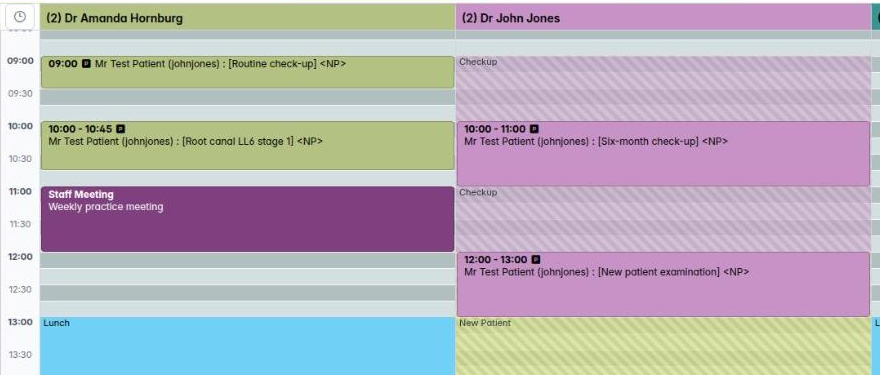
Open Diary events in Diary actions and click one, for example Staff Meeting. The panel says drag across the slots. Drag down the column for the time you need, type a description and click OK. Diary events move and resize just like appointments. Click Done when you have finished.
Placing a treatment plan’s appointments
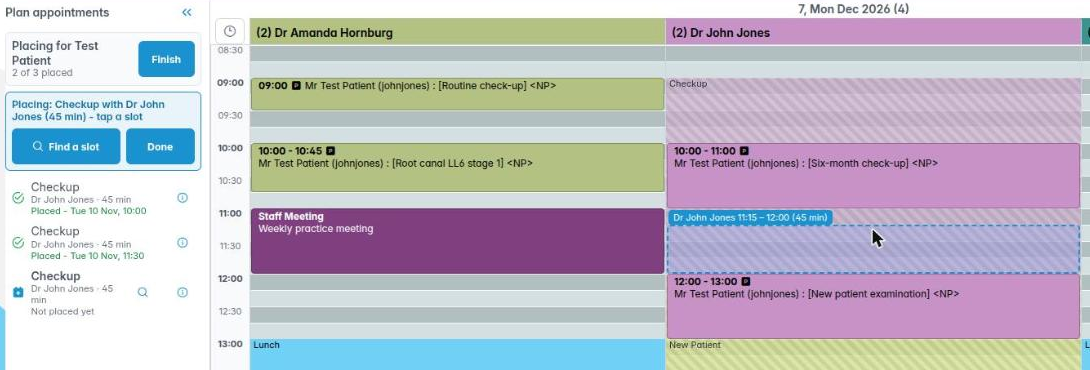
In a treatment plan, click Place appointment in diary on one of the plan’s appointments. The diary opens with the plan’s appointments listed on the left, in plan order, and the next one ready to place.
- Point at a slot: the outline shows how long the appointment is.
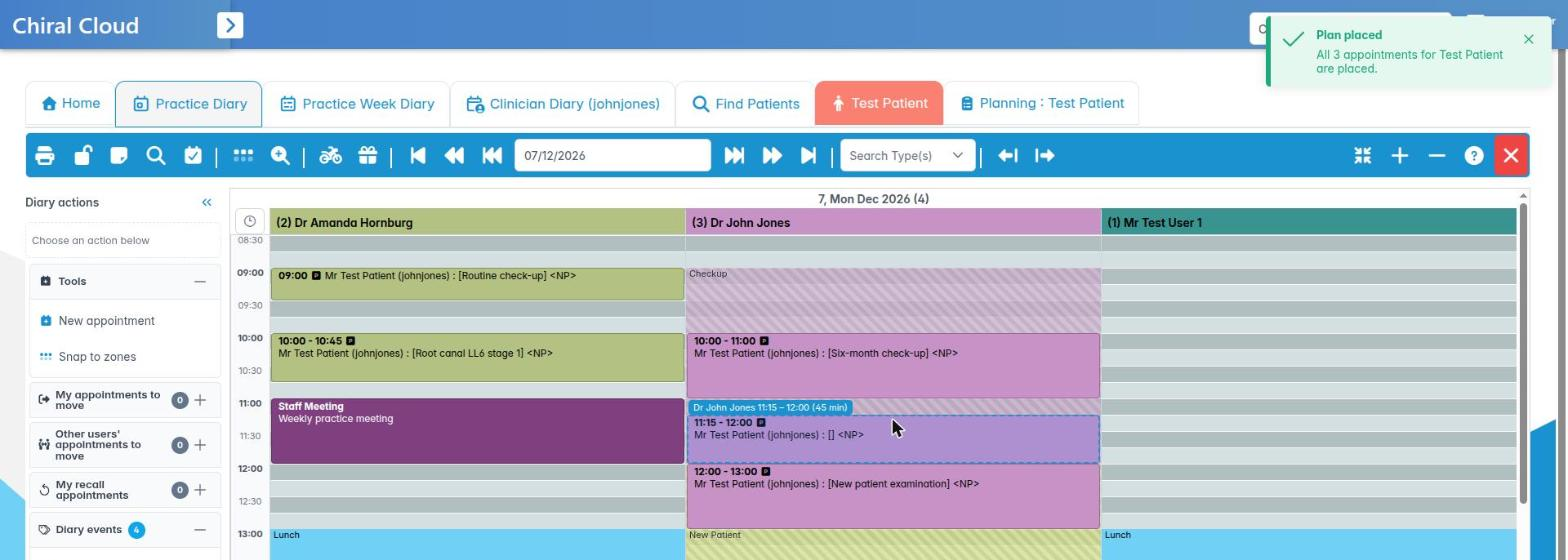
- Click (or drag) to place it. The next appointment is then picked for you.
- Use Find a slot to search for a free time.
- Placing it in another clinician’s column asks whether to book it with them instead.
- Click Finish when you are done. Any you have not placed stay on the plan for later.
Keyboard shortcuts
- Arrow keys: move from one appointment to the next (up, down, left, right).
- Enter: open the selected appointment.
- i: show the selected appointment’s details.
- M: turn the magnifier on or off.
- Shift+F10 or the menu key: open the selected appointment’s menu.
- Esc: close the details, then clear the selection.