
The IOTN recorder works out the Index of Orthodontic Treatment Need for you. You record what you see in the mouth, and the recorder gives the Dental Health Component (DHC) grade, the feature that decides it and whether the patient meets the NHS threshold. You can record IOTN at three stages: Assessment, Appliance fitted and Completion. The values you apply are saved with the orthodontic assessment and used on the FP17O claim.
The examples below use a made-up test patient in a demo practice.
Before you start
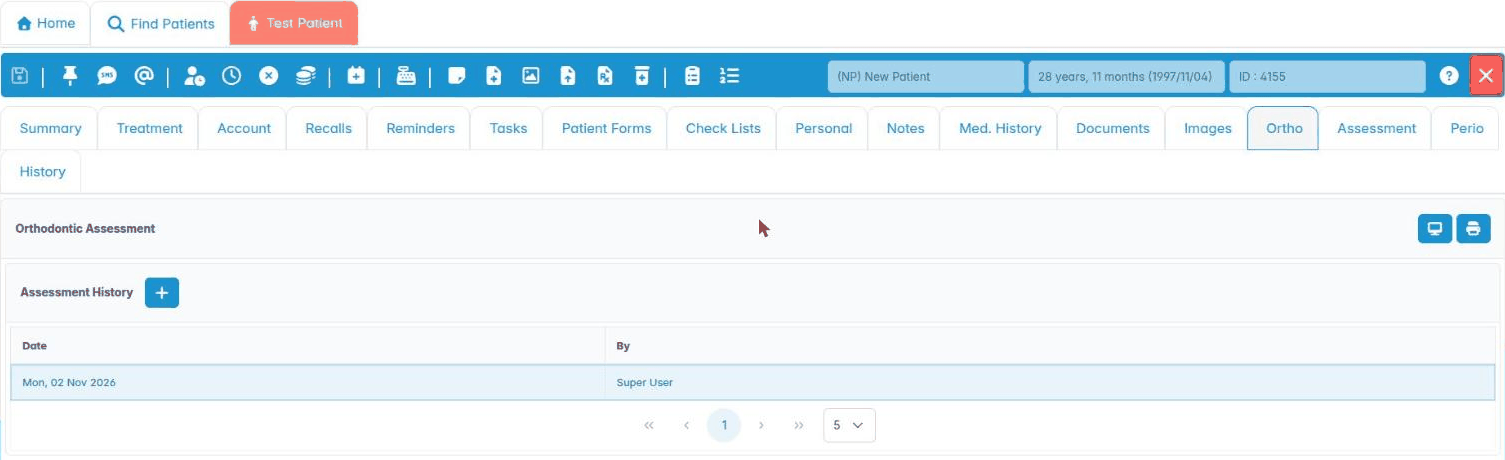
Open the patient record and click the Ortho tab. If the patient has more than one orthodontic assessment, select the one you want in Assessment History, or click + to start a new one.
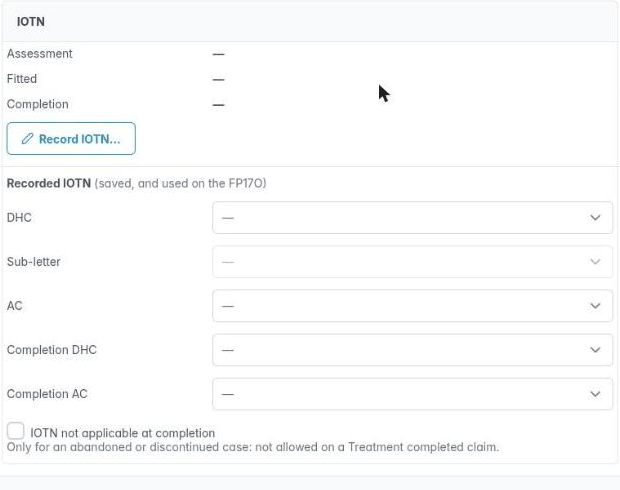
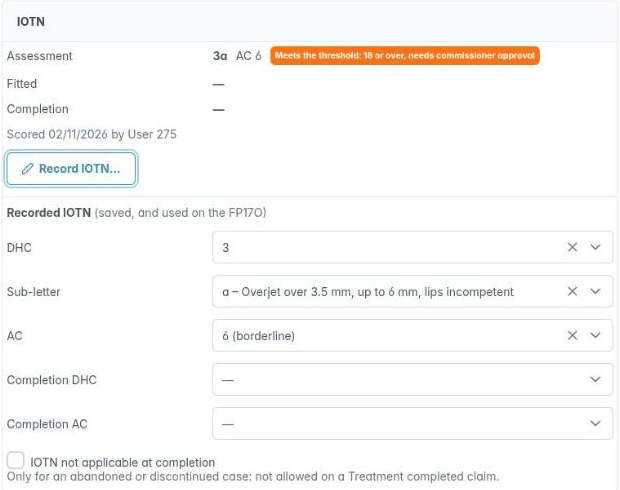
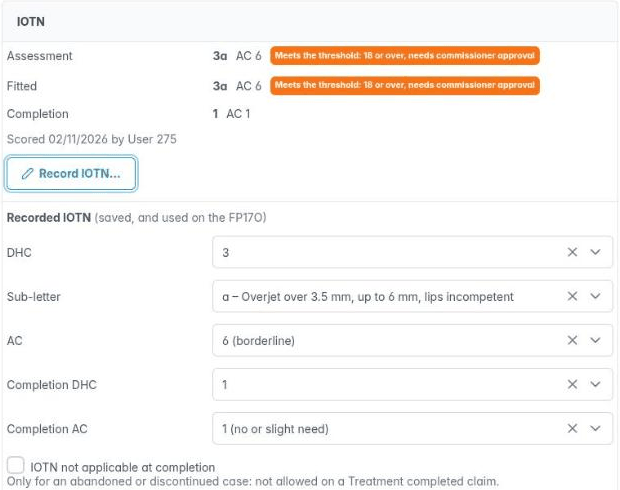
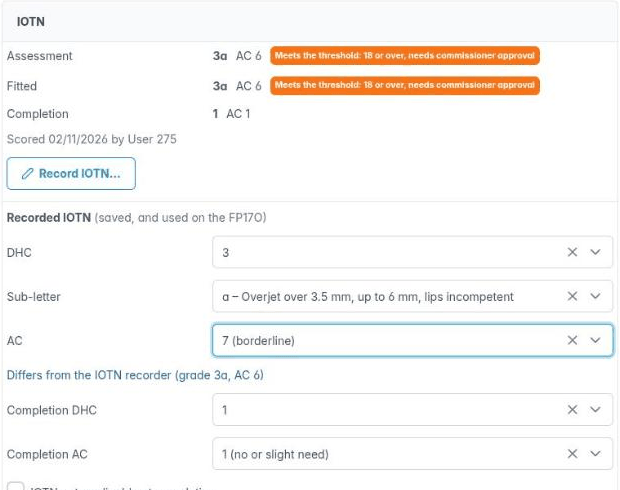
Scroll down to the IOTN box. The top half shows the IOTN recorded at each stage; the Recorded IOTN dropdowns below are the values saved and used on the FP17O.
Recording the assessment IOTN
1. Open the recorder
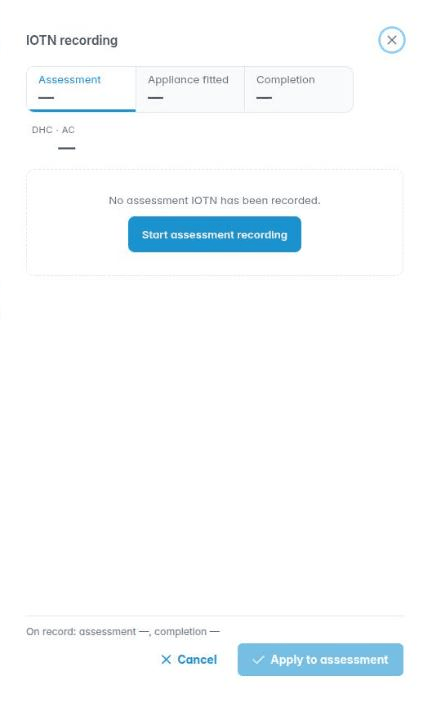
Click Record IOTN…. The recorder opens as a panel on the right. Its three tabs are the three stages, each showing the grade recorded so far. On Assessment, click Start assessment recording.
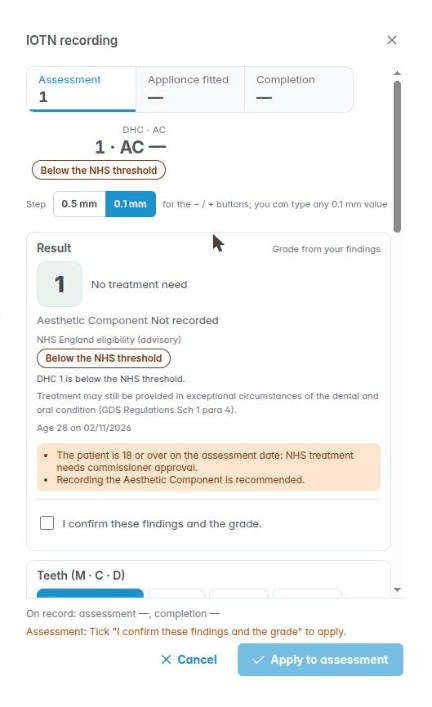
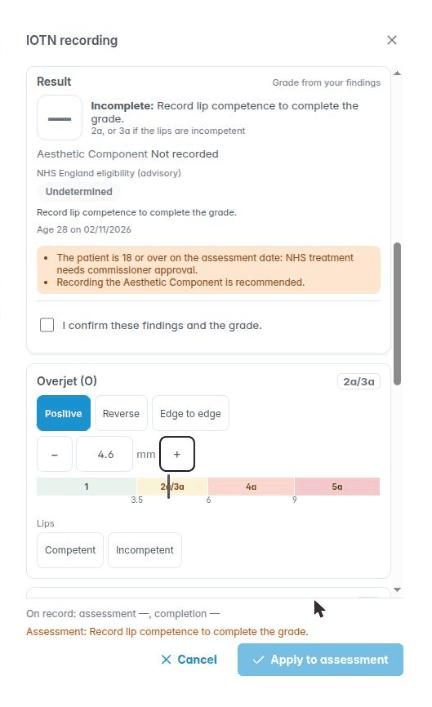
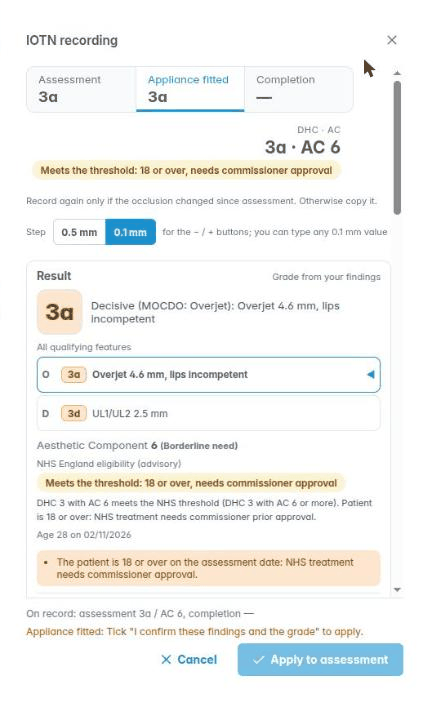
The Result box stays at the top while you scroll, so you can see the grade change as you record. It starts at grade 1 (no treatment need). Warnings appear in the orange box, for example when the patient is 18 or over and NHS treatment needs commissioner approval.
2. Choose the measurement step
The Step buttons set how far the − and + buttons move a measurement: 0.5 mm or 0.1 mm. You can always type any value to 0.1 mm. Your choice is remembered in your browser, so another browser or computer starts at 0.5 mm.
3. Record the overjet
Under Overjet (O), choose Positive, Reverse or Edge to edge, then enter the measurement in mm. The bar under the measurement shows which grade band it falls in. If the grade depends on something else, the recorder asks for it: here a 4.6 mm overjet is grade 2a or 3a depending on the lips, so the Result says Incomplete until you record lip competence.
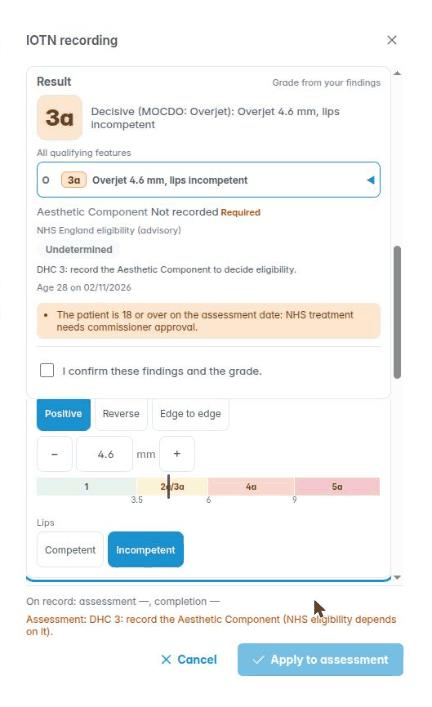
Choose Competent or Incompetent under Lips. With incompetent lips the grade becomes 3a. The Result shows the decisive feature, and because a DHC 3 needs the Aesthetic Component to decide NHS eligibility, the Aesthetic Component is now marked Required.
4. Mark the teeth
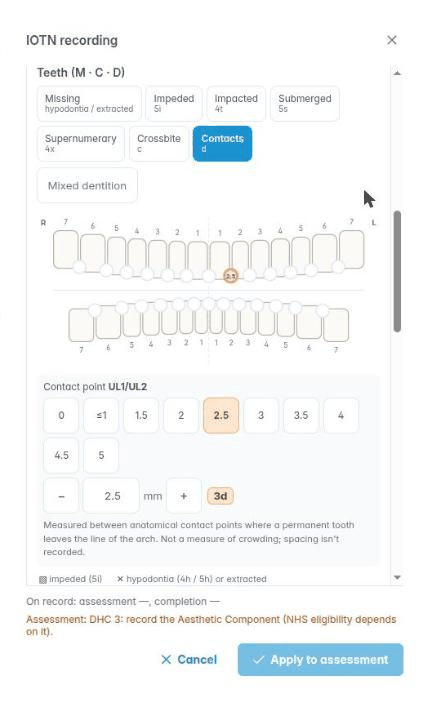
In Teeth (M · C · D), choose what a tap records, then tap the teeth on the chart: Missing (hypodontia or extracted), Impeded, Impacted, Submerged, Supernumerary or Crossbite. Click Mixed dentition for a patient with primary teeth.
To record a displaced contact point, choose Contacts and tap the point between two teeth, then pick the displacement in mm or type it. Measure between anatomical contact points where a permanent tooth leaves the line of the arch; this is not a measure of crowding, and spacing is not recorded. The grade the contact gives (here 3d) is shown next to it.
5. Overbite, open bite, crossbite and other features
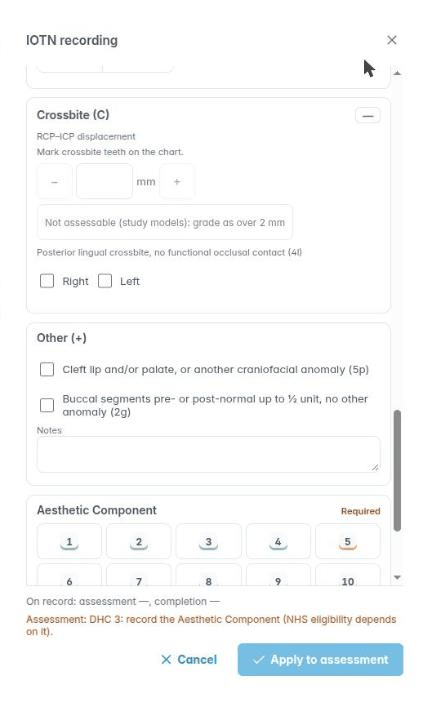
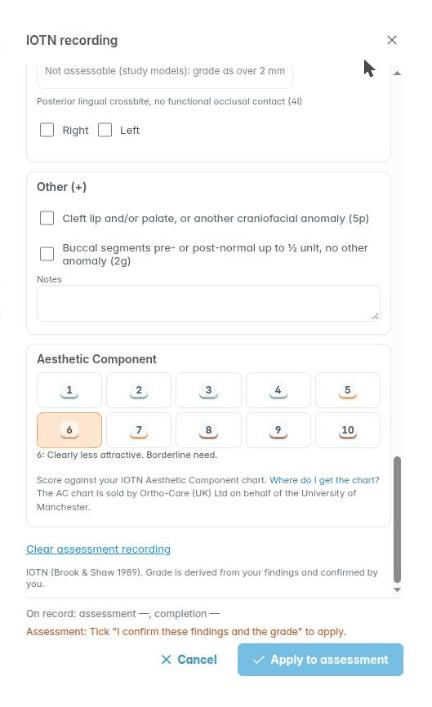
Record Overbite / open bite (O) and Crossbite (C) in the same way. For a crossbite, enter the RCP–ICP displacement and mark the crossbite teeth on the chart; if it can only be assessed on study models, click Not assessable (study models): grade as over 2 mm. Tick Right or Left for a posterior lingual crossbite with no functional occlusal contact (4l).
Under Other (+), tick a cleft lip and/or palate or other craniofacial anomaly (5p), or buccal segments pre- or post-normal up to ½ unit with no other anomaly (2g). Use Notes for anything else you want kept with the recording.
6. Score the Aesthetic Component
Under Aesthetic Component, click the score from 1 to 10 that matches the patient on your IOTN Aesthetic Component chart. The description of the score you chose is shown underneath. The AC chart is sold by Ortho-Care (UK) Ltd on behalf of the University of Manchester.
7. Check the result, confirm and apply
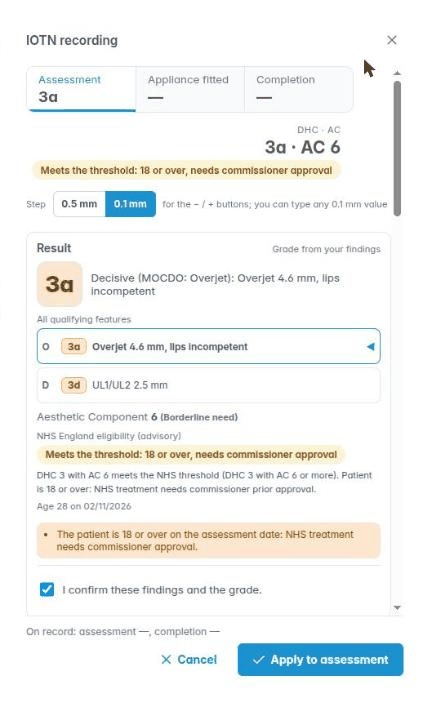
Scroll back to the top to check the Result. It shows:
- the DHC grade and the decisive feature;
- All qualifying features, every finding that gives a grade (here the overjet, 3a, and the contact point, 3d);
- the Aesthetic Component;
- NHS England eligibility (advisory): DHC 4 or 5, or DHC 3 with AC 6 or more, meets the NHS threshold. A patient who is 18 or over needs commissioner approval.
Tick I confirm these findings and the grade, then click Apply to assessment. Apply to assessment stays greyed out until the box is ticked, and the line above it says what is still needed.
The recorder closes. The IOTN box shows the assessment grade, and the Recorded IOTN dropdowns are filled in from it.
8. Save
The IOTN is saved with the orthodontic assessment when you save the patient record: click the Save icon on the patient toolbar, or Save & Exit.
Recording at Appliance fitted
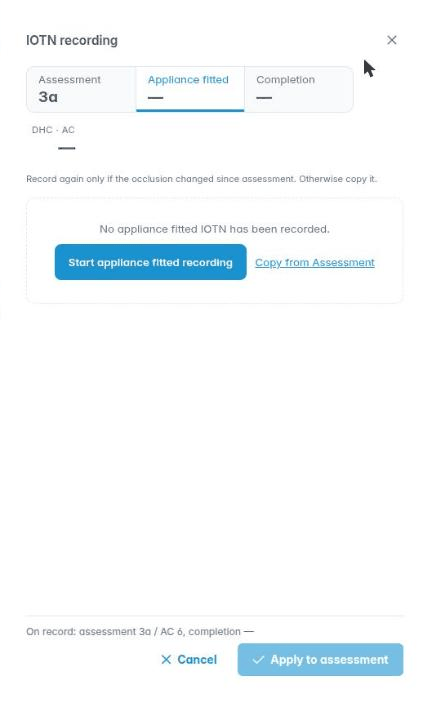
When the appliance is fitted, click Record IOTN… and choose the Appliance fitted tab. If the occlusion has not changed since the assessment, click Copy from Assessment. Otherwise click Start appliance fitted recording and record again.
Copying fills in the same findings. Check the result, tick I confirm these findings and the grade, click Apply to assessment and save the patient.
Recording at Completion
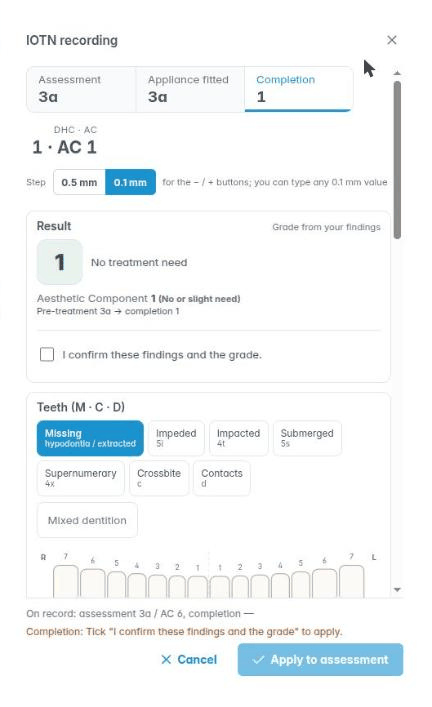
At the end of treatment, choose the Completion tab and click Start completion recording. You can also Copy from Assessment and change what is different.
Record the occlusion as it is now, and the Aesthetic Component. The Result shows the completion grade next to the pre-treatment grade, for example Pre-treatment 3a → completion 1. Confirm, apply and save as before.
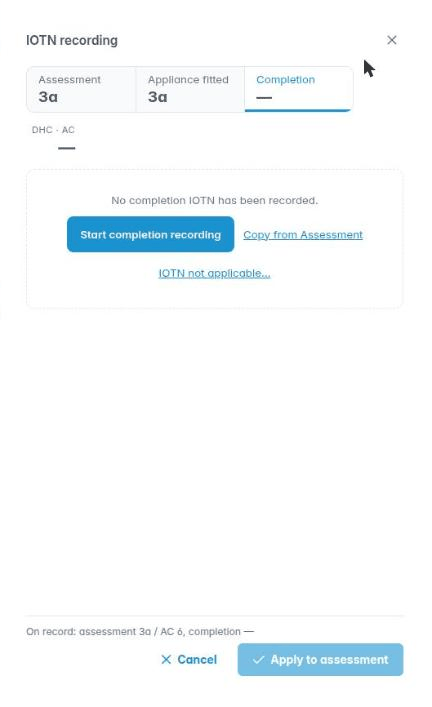
If a case is abandoned or discontinued, click IOTN not applicable… instead. This is not allowed on a Treatment completed claim.
Once all three stages are recorded, the IOTN box shows each of them, and the Recorded IOTN holds the assessment and completion values.
Entering IOTN by hand
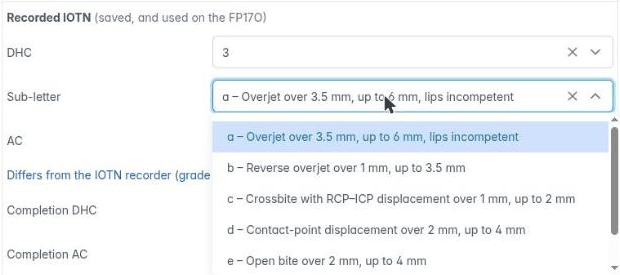
If the recorder doesn’t suit a case, you can still record IOTN the simple way, from the dropdowns. Enter or change the IOTN in the Recorded IOTN dropdowns: DHC 1–5, the Sub-letter, AC 1–10, and Completion DHC and Completion AC. The Sub-letter list only offers letters that fit the DHC grade.
A value you enter by hand takes priority over the recorder. If it is different from the recorder’s result, a note says so, for example Differs from the IOTN recorder (grade 3a, AC 6), so you can check which is right before the claim is sent.
Tick IOTN not applicable at completion only for an abandoned or discontinued case.
IOTN on the FP17O
The FP17O claim uses the Recorded IOTN: the assessment DHC, sub-letter and AC, and on a completion claim the completion IOTN. On an appointment, Orthodontic Details on the Treatments tab shows the IOTN that will be used on the FP17O. A claim with an IOTN problem is not submitted, and a message says why.
Tips
- The recorder’s eligibility is advisory. Treatment may still be provided in exceptional circumstances of the dental and oral condition (GDS Regulations Sch 1 para 4).
- To start a stage again, scroll to the bottom of the recorder and click Clear assessment recording (or Clear appliance fitted recording, Clear completion recording).
- Cancel closes the recorder without applying your changes. The line above it shows what is on record now.
- The IOTN is part of the orthodontic assessment, so it is not saved until you save the patient record.